Before Starting
The process for handling TurboTax Desktop (Windows or Mac) is DIFFERENT than if you’re uploading your donations to TurboTax ONLINE. If you’re using TurboTax ONLINE, you can’t use the TXF file and you should read this article here on what you need to do for TurboTax ONLINE.
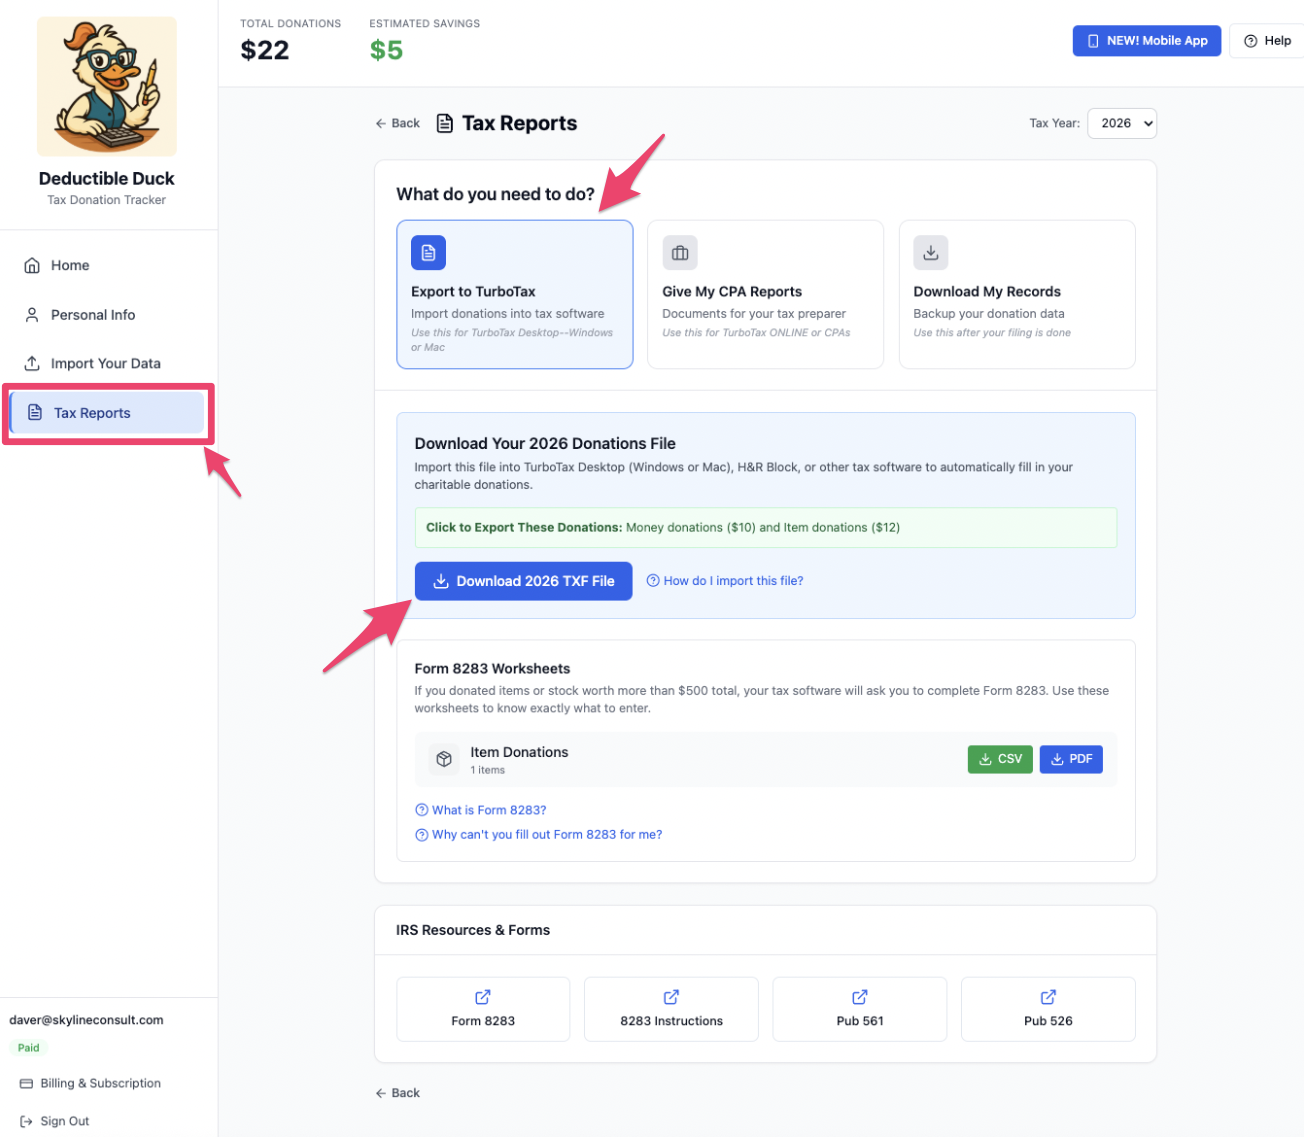
Make sure you’ve EXPORTED your TXF file from Deductible Duck using the instructions in our Tax Reports section. You’ll need that information here.
Only ITEM and MONEY donations can import into TurboTax Due to TXF Limits
The TXF file format supported by TurboTax and other software is very, very old (35 years+, to be exact) and the data format used is very limited. Unfortunately, this means that only two types of donations can be imported into TurboTax from Deductible Duck: ITEMS and MONEY. Mileage and Stock donations must be entered manually into TurboTax because the TXF file does not allow the right amount of data to transfer with them to complete the donation record.
There are two versions of the desktop import instructions. Pick your operating system: Windows or Mac.
Jump to the Windows guide or the Mac guide.
What if I make a mistake and need to re-import?
No problem! Make sure you remove the imported data file FIRST and then go through the steps to re-export from Deductible Duck and re-import back into TurboTax. We have instructions on how to remove imported data.
Importing For TurboTax Windows
1. Open TurboTax
2. Add your income and wages first
3. Navigate to Deductions and Credits
4. Import your TXF File from Deductible Duck
First, go to the File menu and select Import -> From Accounting Software:

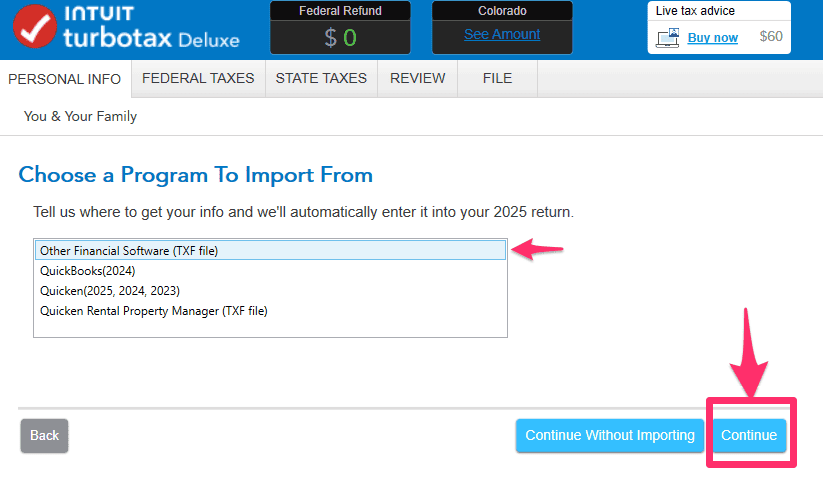
Next, you’ll end up on this screen. Click Other Financial Software (TXF File). And then click Continue
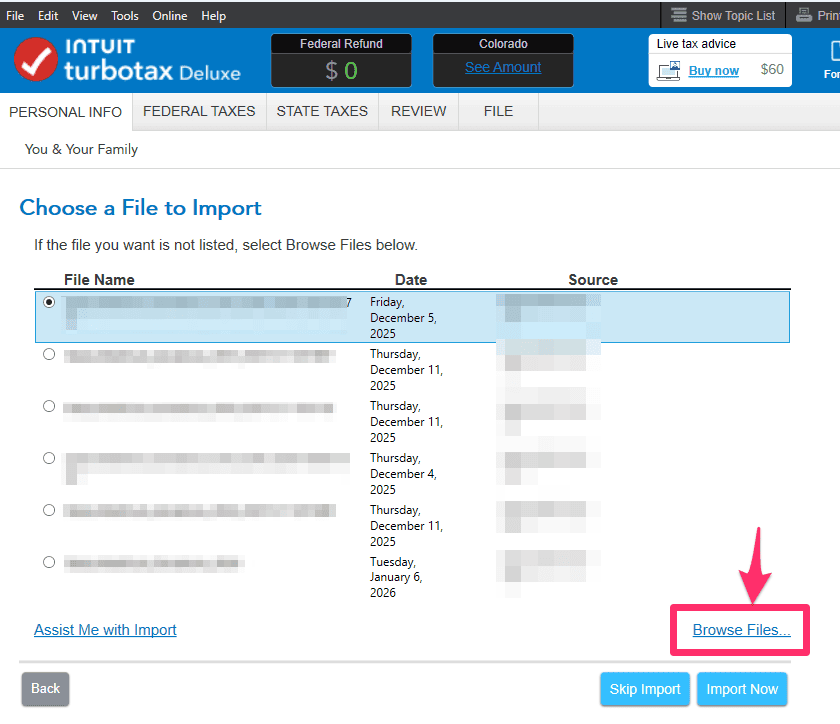
Now you’ll come to the imported files screen–you may see other files you’ve already imported, such as W-2s or 1099s. Ignore these for now and click Browse Files link
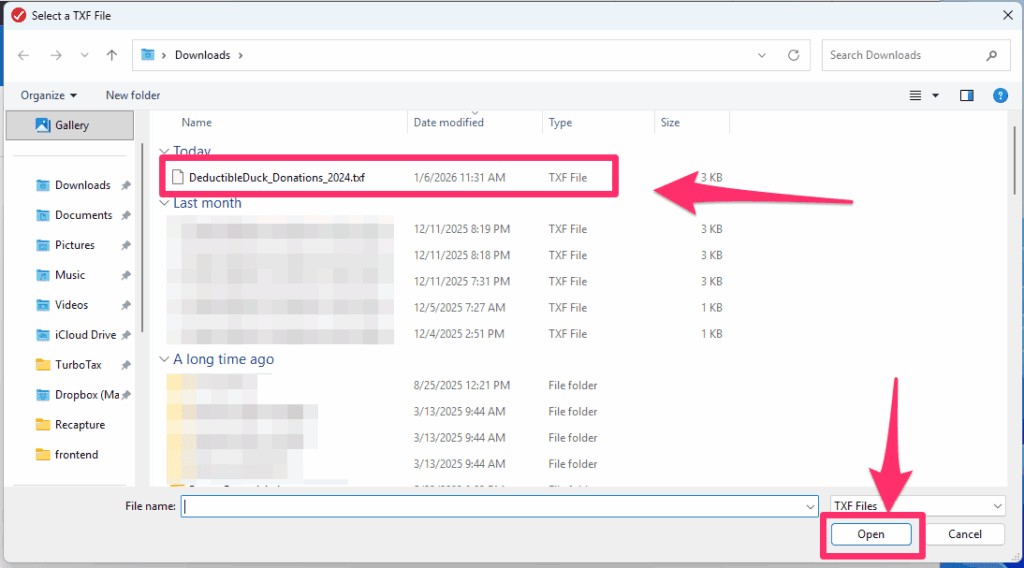
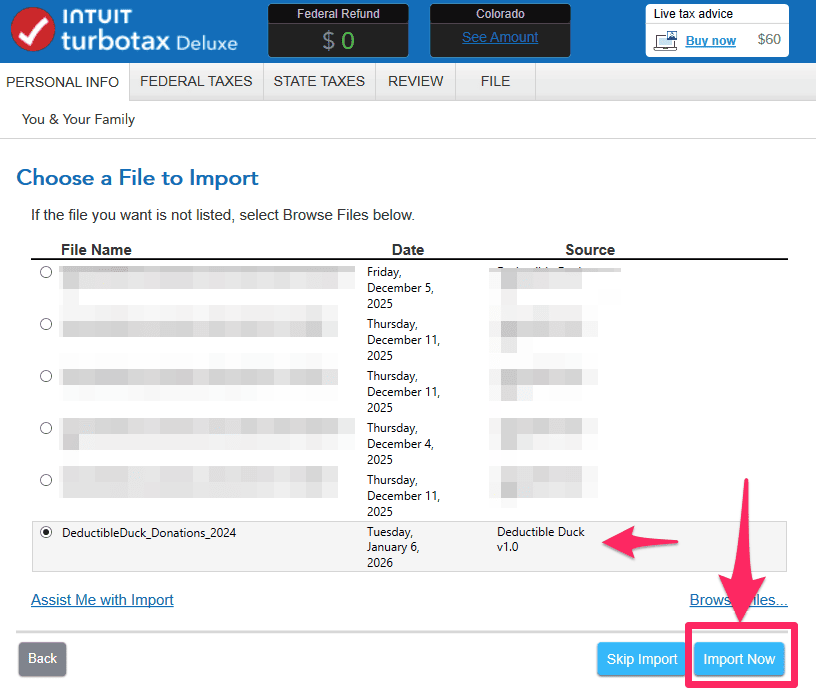
Pick the file you exported earlier:
And then you should see something like this in your TurboTax screen:
Once you do, click Continue. You’ll end up here where you confirm a list of your ITEM DONATIONS and MONEY DONATIONS to charities and the amount you donated for each individual date from Deductible Duck. The example below shows 4 item donations to ARC THRIFT STORES and 2 money donations to GOODWILL.
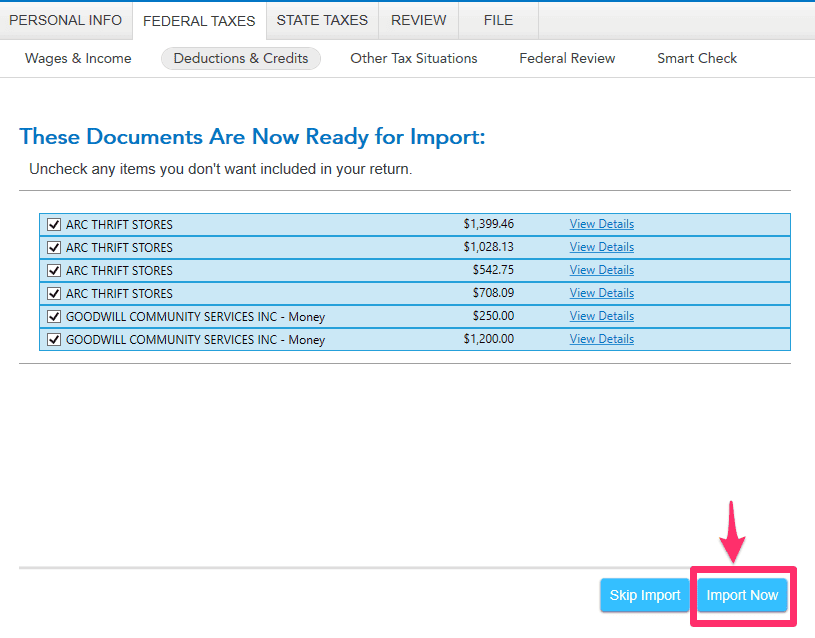
Why Don’t I See Mileage or Stock Donations in the TXF File?
The TXF format is over 35 years old and is very limited in what data it can send to TurboTax. Only ITEM and MONEY Donations are currently supported, due to this limitation in the TXF format. You must enter Mileage and Stock Donations manually into TurboTax.
Click Import Now to move to the next step where the imports are confirmed. You may see other imported documents here, such as you W-2 or 1099s that you’ve added from other financial institutions, which is fine. But you should definitely see your Deductible Duck TXF file:
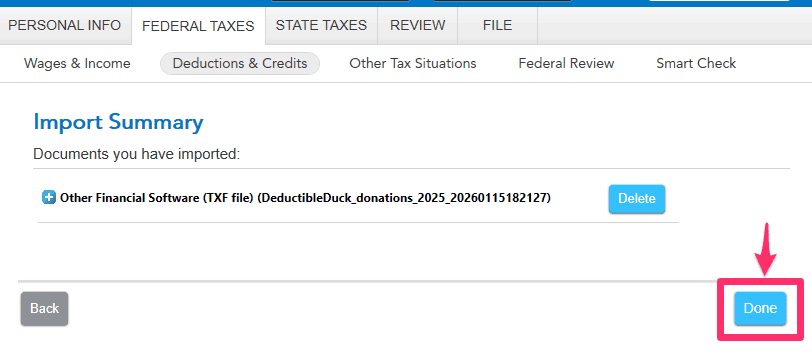
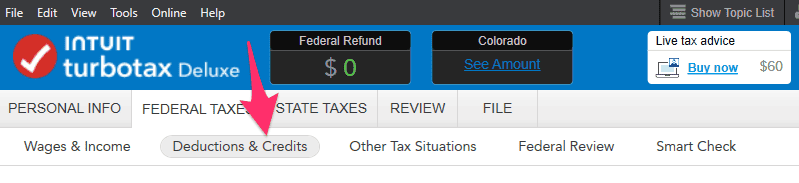
Click Done, which will take you back into the interview mode. You’ll want to move to the Deductions and Credits screen, so click on this to get there:
5. Review Your Charities
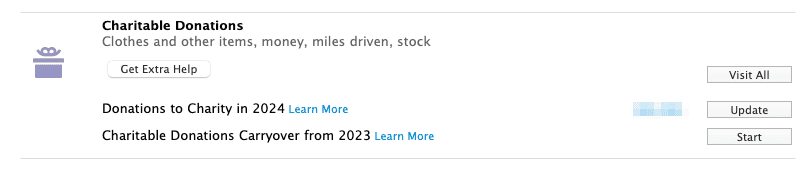
Look under Charitable Donations for something like this:
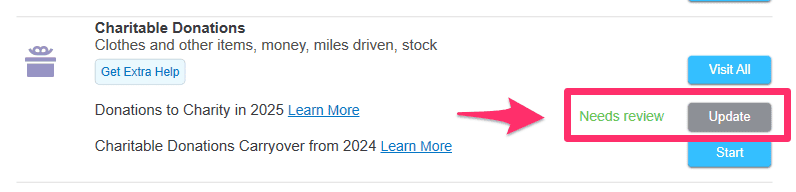
And click Update. This will take you to a summary screen, again showing your charities that came over from Deductible Duck:
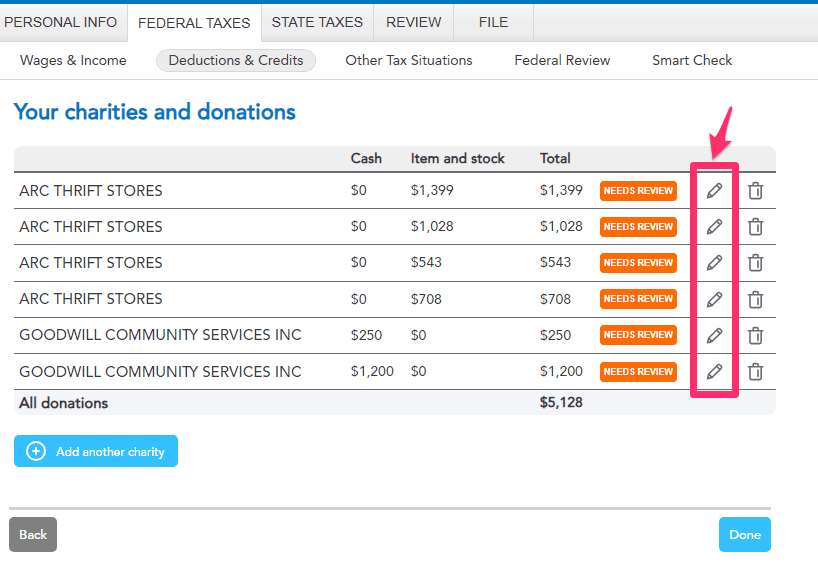
You will now need to individually edit each item and/or money donation to add additional information about the donation that Deductible Duck cannot transfer over to TurboTax. Click the pencil icon on each donation, one at a time.
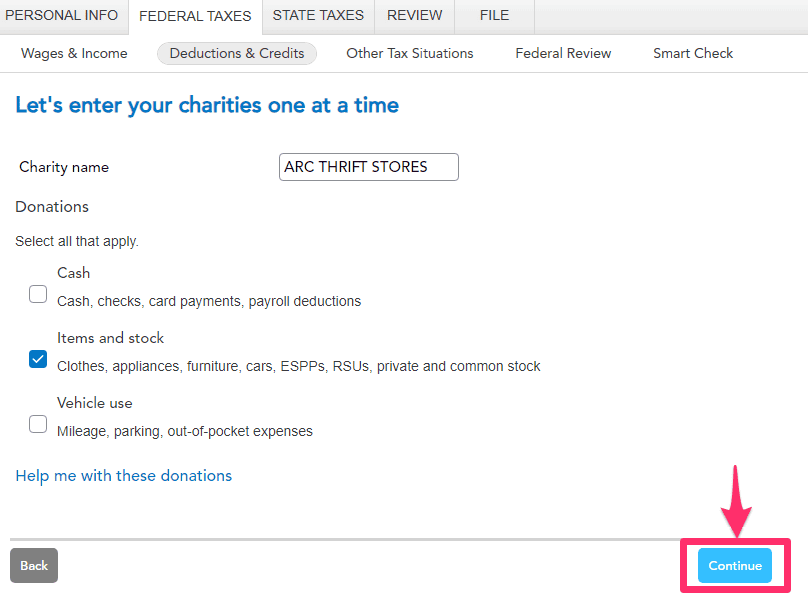
First, confirm that the donation type and charity name are correct here, if so, click Continue:
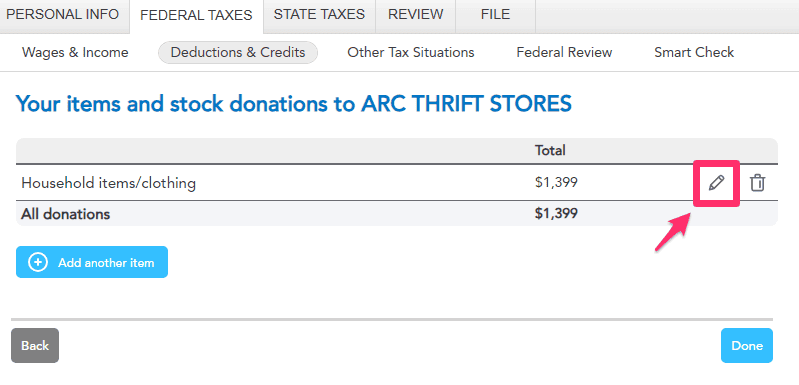
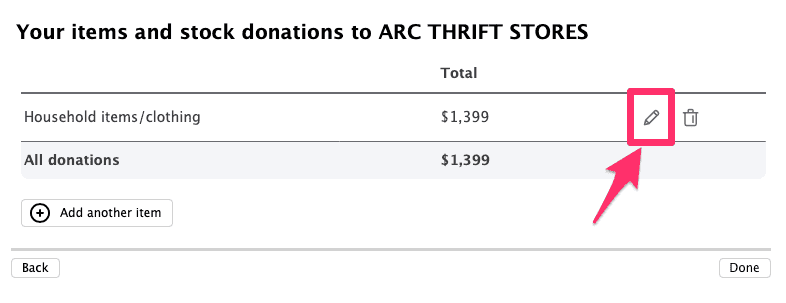
Now, click the Pencil icon here to answer questions about the individual donation:
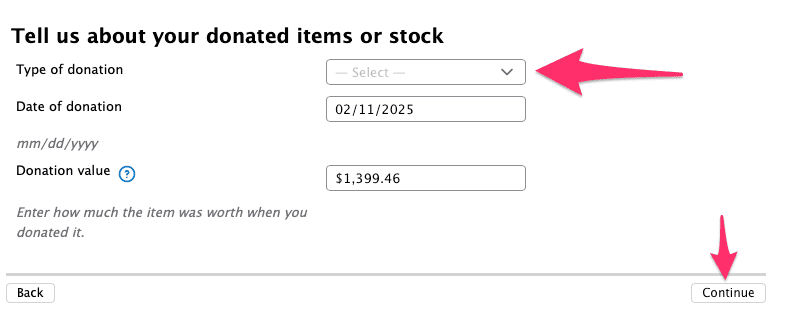
First, select the TYPE of donation you made. For items, this is “Household Items and Clothing”, and then click Continue:

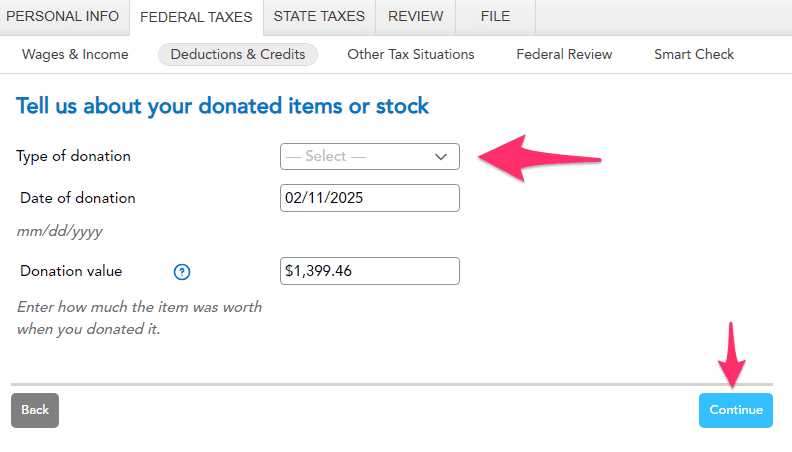
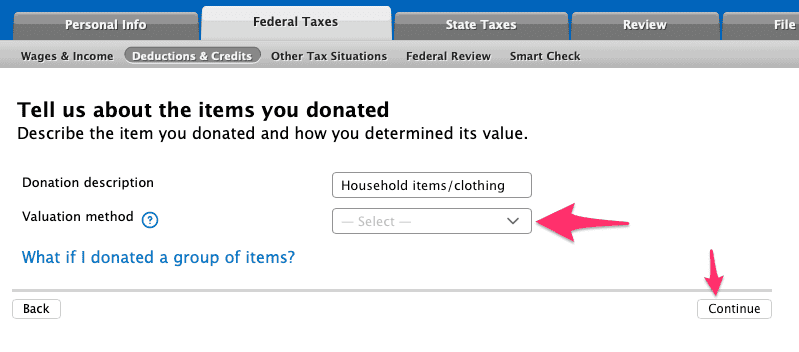
Next, you need to pick a Valuation Method. You can use “Thrift Shop Value” or “Comparative Sales” because Deductible Duck uses BOTH of these methods, so either is correct. And then click Continue.

If your donation is over $500, you’ll be asked about purchase information, like this:

Select the answer that applies to your situation. For Purchase Price, you can either enter the amount you know you paid, if you remember it. Or you can estimate the value of your purchase. A typical IRS guideline says that Thrift Shop Value is between 10-20% of retail value of an item, so if you got the FMV estimate from Deductible Duck as $35, you can take $35 and divide by 10% to get the estimate purchase value (35 / 0.10 = $350). Take your best guess here, and using 10% is always a conservative approach to estimating the purchase value.
Answer the remaining questions about “multiple dates” and length of ownership. Once you’re done, click Continue.
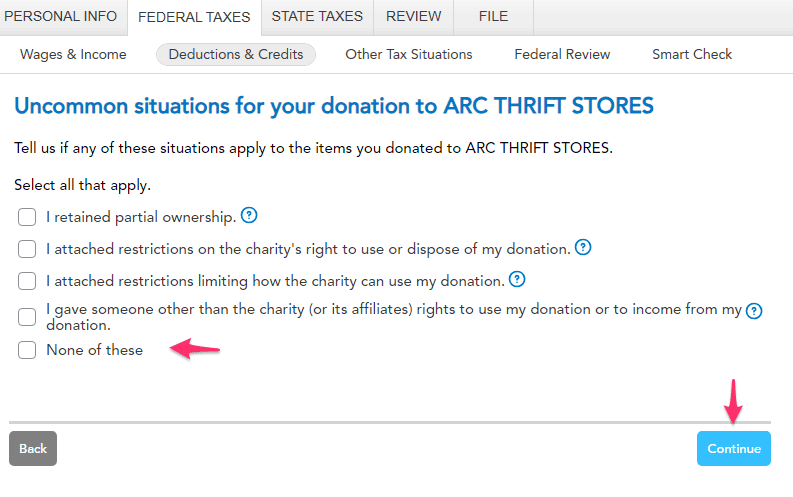
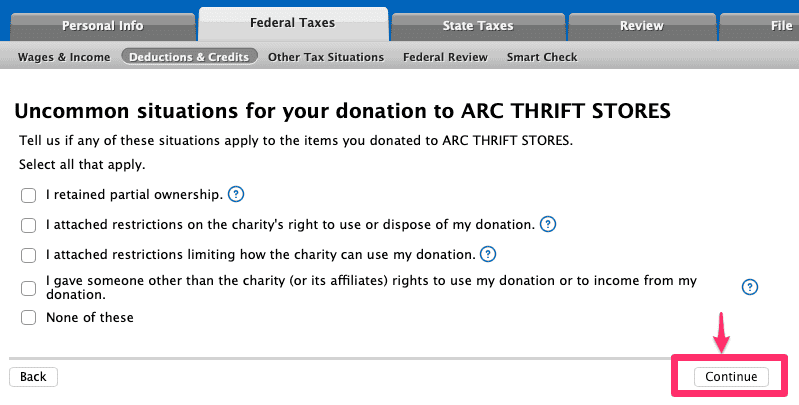
Lastly, you have to answer about uncommon scenarios here: If none apply, then click the last option and then Continue.
6. Enter Address Info for Charities
For some donations over $500 to a single charity, you’ll be asked to enter the address information about each charity. This is required for Form 8283 and isn’t something Deductible Duck can transfer over automatically. Enter the address info from Deductible Duck (use the PDF report or just refer to it inside of Deductible Duck directly) and click Continue. You can reference this information from Deductible Duck when entering it.
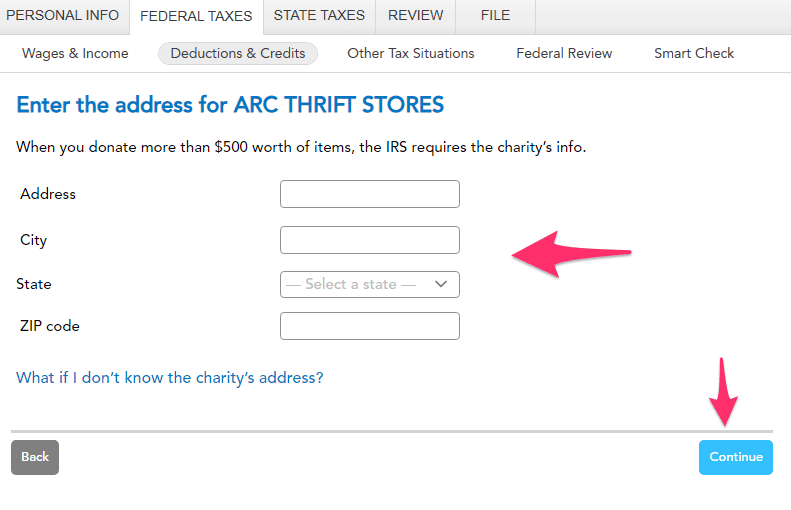
Click Continue when you’ve finished entering it.
Why can’t Deductible Duck automatically send the address information to TurboTax?
Good question! The TXF format has very limited information it allows us to move over to TurboTax. Deductible Duck tracks and has access to the charity’s address, but TurboTax chooses NOT to read the address information inside of the file. We don’t control this, unfortunately. So you have to re-enter for each charity. However, if you donate multiple times to the same charity with the same name, having the address info is enough for the FIRST ONE in most cases.
If you have larger donations, you may be asked about the physical condition of goods you donated over $5,000, like this:
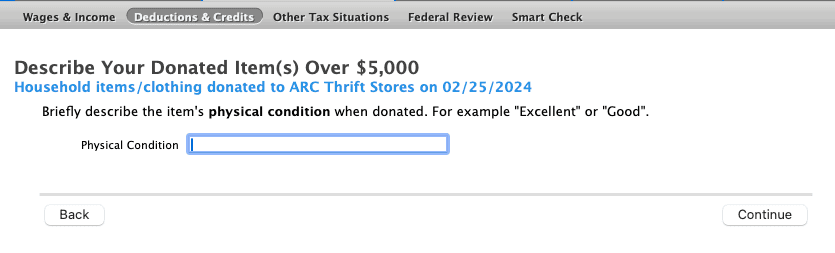
Make sure you enter a value that is consistent with the donation. Deductible Duck uses “Good” and “Fair” as our two categories for conditions. A “Low” or “Poor” item is not considered acceptable per IRS Publication 561.
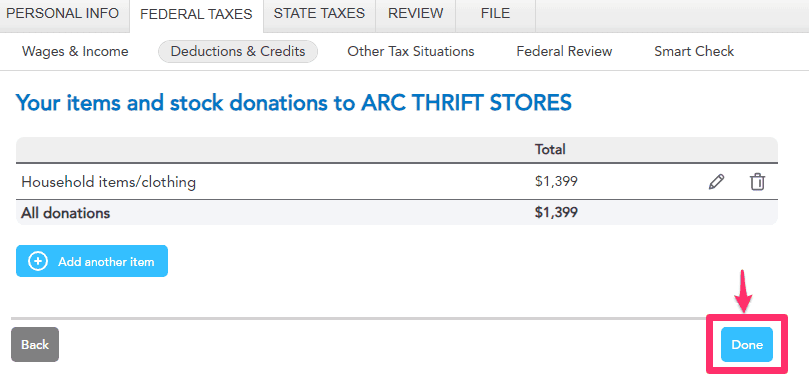
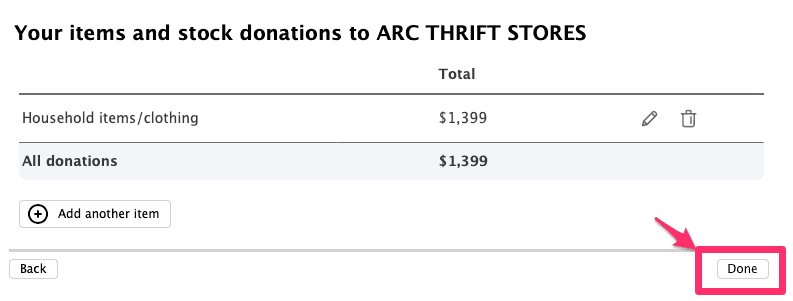
Once you’ve completed that for this item donation, click Done:
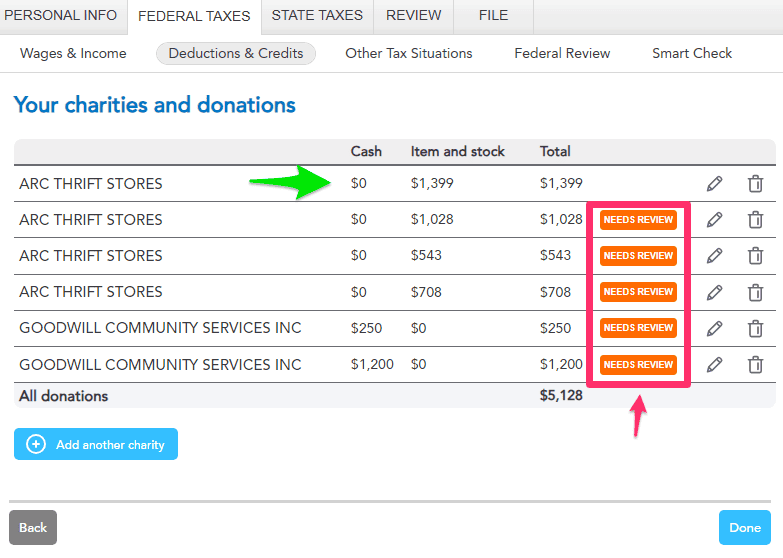
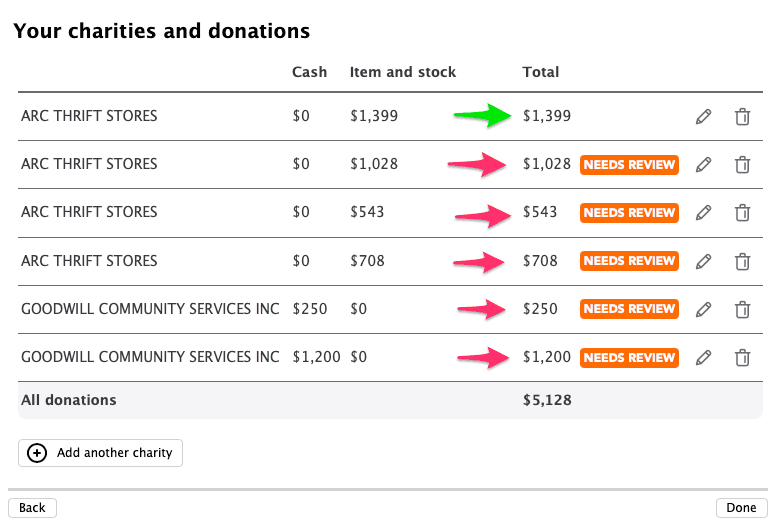
You will return to the main screen, but now you’ll see the “Needs Review” disappear for that donation (green arrow) and remains for the other donations (pink arrow/box):
Repeat Steps 5 and 6 until you have no more “Needs Review” banners left.
When you have processed ALL of the donations, you can click Done and return to the Deductions and Credits screen and you should see something like this:
with your total amount of donations in the blue blurred field instead.
7. Review Form 8283 and fill out, if applicable
Now you can review Form 8283 for your donations valued more than $500 if you need to by clicking on the Forms view here:
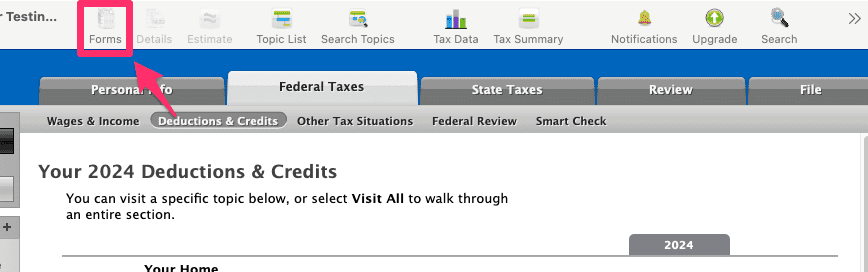
And then checking out your specific forms, generated automatically based on the donations you gave and the charities to whom you donated. This is a SAMPLE of what you might see, not an exact replica:
Click on a Form 8283 to see the current state of the form and to edit/enter Form 8283 data. Don’t forget that Deductible Duck provides you a way to fill out the Form 8283 using our Worksheet, which is available under Tax Reports.
Why can’t Deductible Duck automatically populate Form 8283 in TurboTax?
Form 8283 requires a fair amount of complex data, all of which Deductible Duck is tracking for you. Unfortunately, the TXF format used to send the data to TurboTax does not support moving that data over. Instead, we provide you a way to generate a Form 8283 Worksheet and get the exact information you need to populate this form, column-by-column. See our Tax Reports article on how to export that report in more detail.
And that’s it–you’re done!
Importing For TurboTax Mac
1. Open TurboTax
2. Add your income and wages first
3. Navigate to Deductions and Credits

4. Import your TXF File from Deductible Duck
First, go to the File menu and select Import -> From TXF FIles:

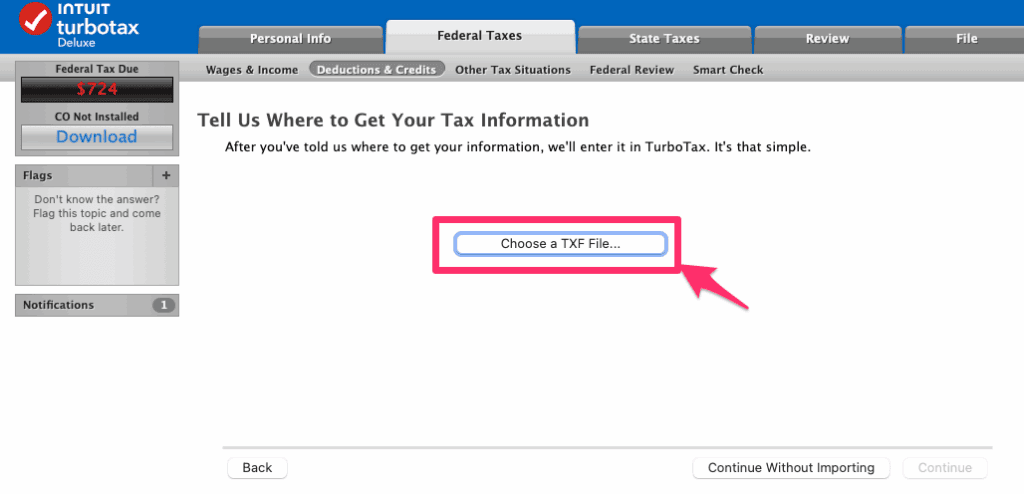
Next, you’ll end up on this screen. Click Choose a TXF File.
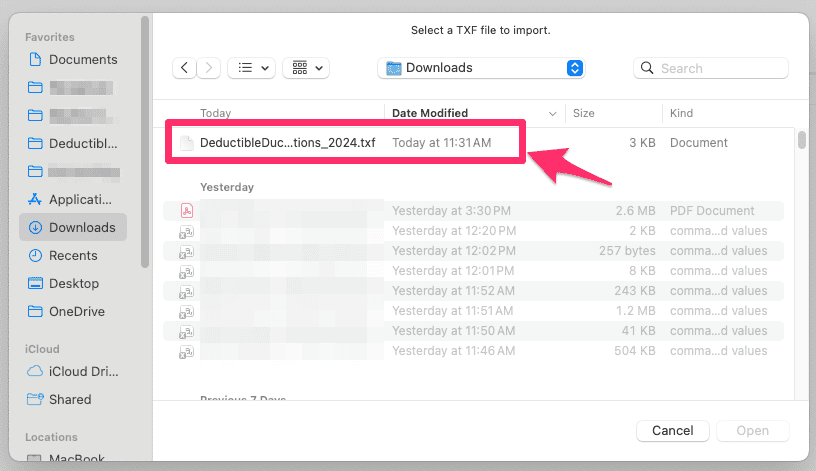
Pick the file you exported earlier:
And then you should see something like this in your TurboTax screen:
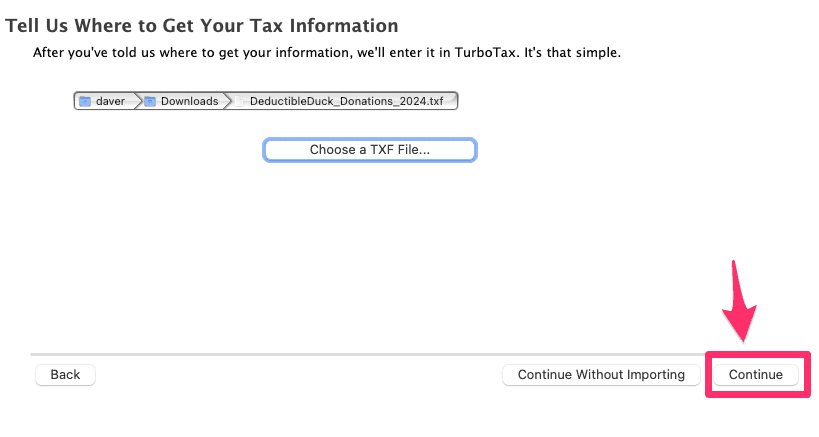
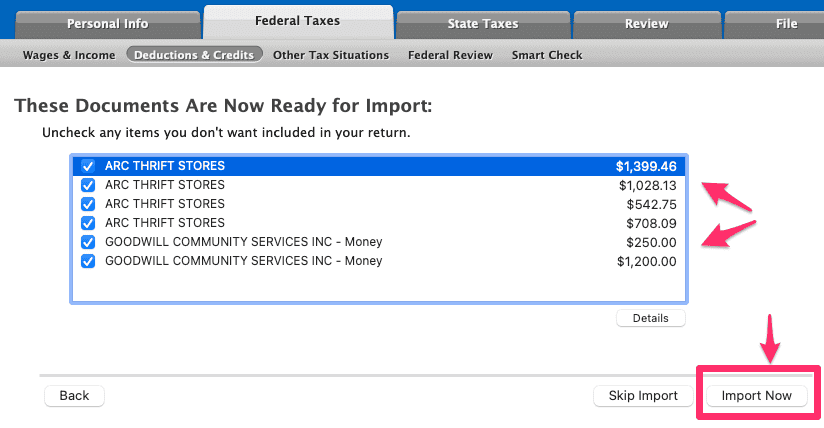
Once you do, click Continue. You’ll end up here where you confirm a list of your ITEM DONATIONS and MONEY DONATIONS to charities and the amount you donated for each individual date from Deductible Duck. The example below shows 4 item donations to ARC THRIFT STORES and 2 money donations to GOODWILL.
Why Don’t I See Mileage or Stock Donations in the TXF File?
The TXF format is over 35 years old and is very limited in what data it can send to TurboTax. Only ITEM and MONEY Donations are currently supported, due to this limitation in the TXF format. You must enter Mileage and Stock Donations manually into TurboTax.
Click Import Now to move to the next step where the imports are confirmed. You may see other imported documents here, such as you W-2 or 1099s that you’ve added from other financial institutions, which is fine. But you should definitely see your Deductible Duck TXF file:
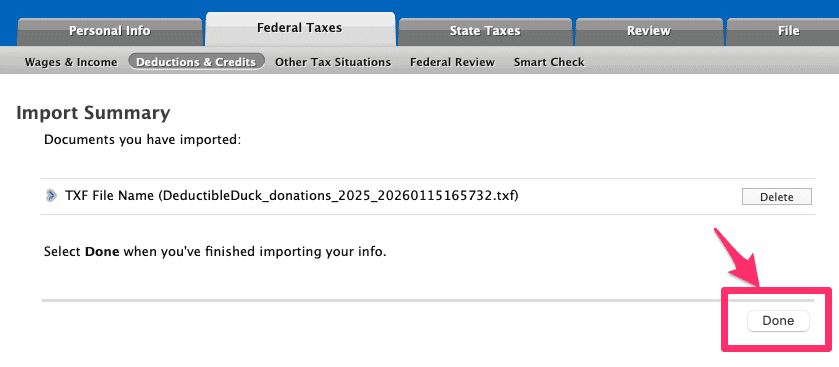
Click Done, which will take you back to your Deductions and Credits screen.
5. Review Your Charities
Look under Charitable Donations for something like this:
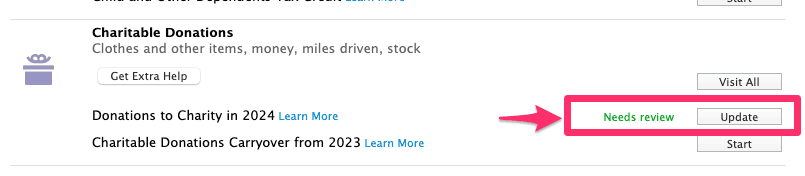
And click Update. This will take you to a summary screen, again showing your charities that came over from Deductible Duck:
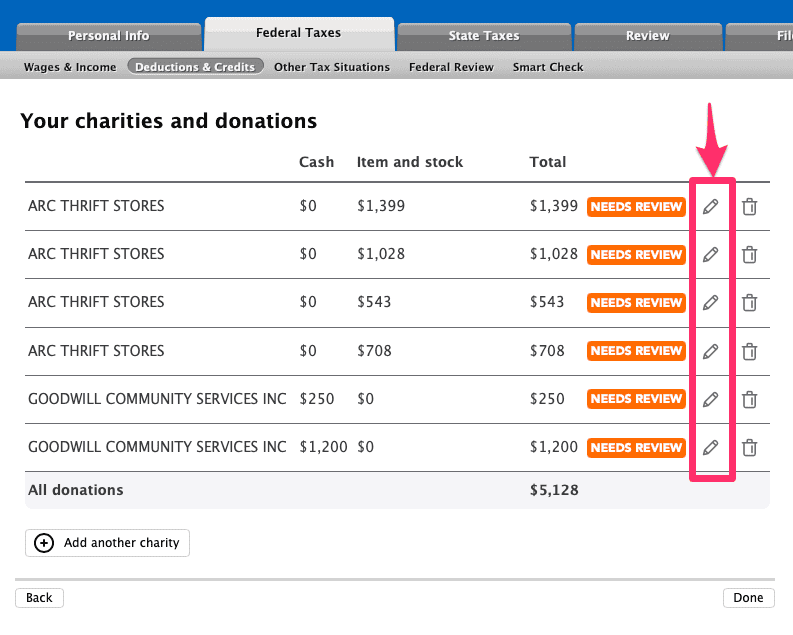
You will now need to individually edit each item and/or money donation to add additional information about the donation that Deductible Duck cannot transfer over to TurboTax. Click the pencil icon on each donation, one at a time.
First, confirm that the donation type and charity name are correct here, if so, click Continue:

Now, click the Pencil icon here to answer questions about the individual donation:
First, select the TYPE of donation you made. For items, this is “Household Items and Clothing”, and then click Continue:
Next, you need to pick a Valuation Method. You can use “Thrift Shop Value” or “Comparative Sales” because Deductible Duck uses BOTH of these methods, so either is correct. And then click Continue.
If your donation is over $500, you’ll be asked about purchase information, like this:
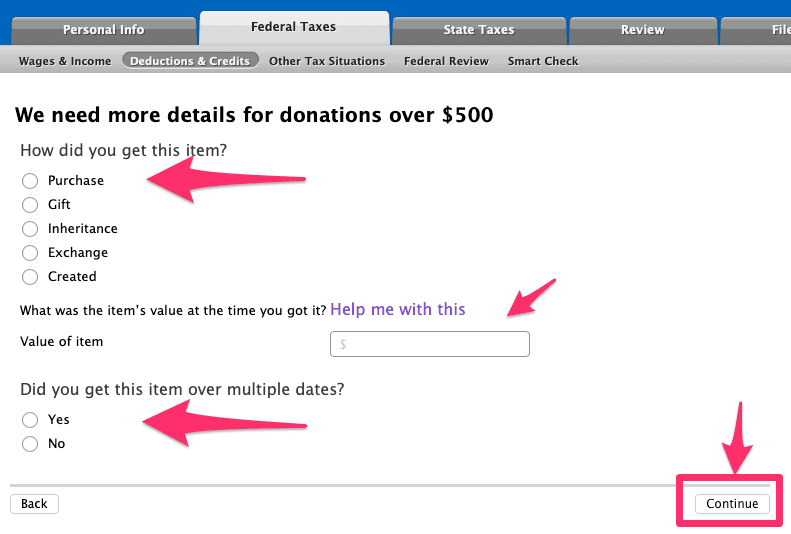
Select the answer that applies to your situation. For Value of Item, you can either enter the amount you know you paid, if you remember it. Or you can estimate the value of your purchase. A typical IRS guideline says that Thrift Shop Value is between 10-20% of retail value of an item, so if you got the FMV estimate from Deductible Duck as $35, you can take $35 and divide by 10% (35 / 0.10 = $350) and get an estimated value of the purchase ($350). Take your best guess here, and using 10% is always a conservative approach to estimating the purchase value.
Answer the remaining questions about “multiple dates” and length of ownership. Once you’re done, click Continue.
Lastly, you have to answer about uncommon scenarios here: If none apply, then click the last option and then Continue.
6. Enter Address Info for Charities
For some donations over $500 to a single charity, you’ll be asked to enter the address information about each charity. This is required for Form 8283 and isn’t something Deductible Duck can transfer over automatically. Enter the address info from Deductible Duck (use the PDF report or just refer to it inside of Deductible Duck directly) and click Continue. You can reference this information from Deductible Duck when entering it.
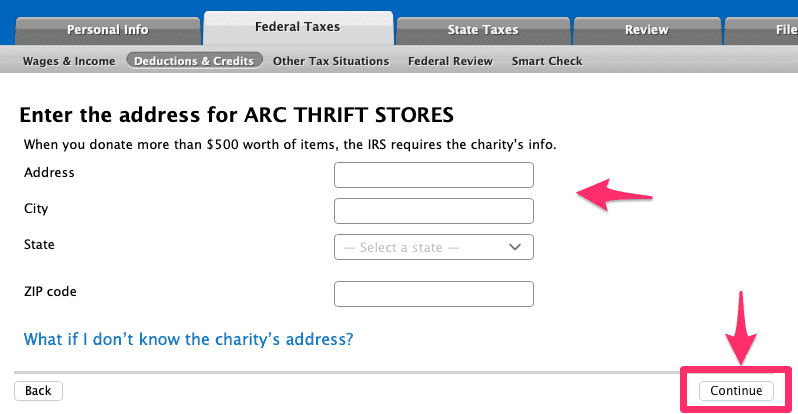
Click Continue when you’ve finished entering it.
Why can’t Deductible Duck automatically send the address information to TurboTax?
Good question! The TXF format has very limited information it allows us to move over to TurboTax. Deductible Duck tracks and has access to the charity’s address, but TurboTax chooses NOT to read the address information inside of the file. We don’t control this, unfortunately. So you have to re-enter for each charity. However, if you donate multiple times to the same charity with the same name, having the address info is enough for the FIRST ONE in most cases.
If you have larger donations, you may be asked about the physical condition of goods you donated over $5,000, like this:
Make sure you enter a value that is consistent with the donation. Deductible Duck uses “Good” and “Fair” as our two categories for conditions. A “Low” or “Poor” item is not considered acceptable per IRS Publication 561.
Once you’ve completed that for this item donation, click Done:
You will return to the main screen, but now you’ll see the “Needs Review” disappear for that donation (green arrow) and remains for the other donations (pink arrows):
Repeat Steps 5 and 6 until you have no more “Needs Review” banners left.
When you have processed ALL of the donations, you can click Done and return to the Deductions and Credits screen and you should see something like this:
with your total amount of donations in the blue blurred field instead.
7. Review Form 8283 and fill out, if applicable
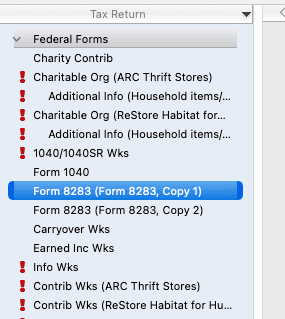
Now you can review Form 8283 for your donations valued more than $500 if you need to by clicking on the Forms view here:
And then checking out your specific forms, generated automatically based on the donations you gave and the charities to whom you donated. This is a SAMPLE of what you might see, not an exact replica:
Click on a Form 8283 to see the current state of the form and to edit/enter Form 8283 data. Don’t forget that Deductible Duck provides you a way to fill out the Form 8283 using our Worksheet, which is available under Tax Reports.
Why can’t Deductible Duck automatically populate Form 8283 in TurboTax?
Form 8283 requires a fair amount of complex data, all of which Deductible Duck is tracking for you. Unfortunately, the TXF format used to send the data to TurboTax does not support moving that data over. Instead, we provide you a way to generate a Form 8283 Worksheet and get the exact information you need to populate this form, column-by-column. See our Tax Reports article on how to export that report in more detail.
And that’s it–you’re done!