Import Your Data allows you to bring your donation records from another donation tracking tool into Deductible Duck. This is especially helpful if you’ve been using another tool and want to migrate your data.
When to Use This Feature
Use Import Your Data if you:
- Have donation records from a previous year in another tool
- Are switching to Deductible Duck from another donation tracker
- Have an export file with your donation information
What File Format You Need
Deductible Duck accepts:
- ZIP files – Compressed donation archives, exported from ItsDeductible ONLY
- CSV files – Comma-separated donation lists, exported from ItsDeductible ONLY
- File size limit – Up to 10 MB
ℹ️ Note: If you’re coming from TurboTax, you should export your data as a ZIP or CSV file first if you exported before the Oct 21, 2025 deadline.
Deductible Duck cannot import just any old CSV–it must have the correct format and headers from ItsDeductible. Also, Deductible Duck cannot import PDFs as they lack structure to be able to be correctly and accurately parsed by Deductible Duck.
Step-by-Step Import Process

Step 1: Click “Choose File”
- On the Import Your Data screen, you will see a large box with an upload icon.
- Click the blue “Choose File” button.
- A file browser will open on your computer.
Step 2: Select Your File
- Navigate to where you saved your donation file.
- Select the ZIP or CSV file containing your donation data.
- Click Open (or Choose on Mac).
ℹ️ Tip: The file name will appear in the upload box once selected.
Step 3: Alternative – Drag and Drop
You can also:
- Have your file open in a folder window on your computer.
- Drag the file directly into the large box on the import screen.
- Drop it into the upload area.
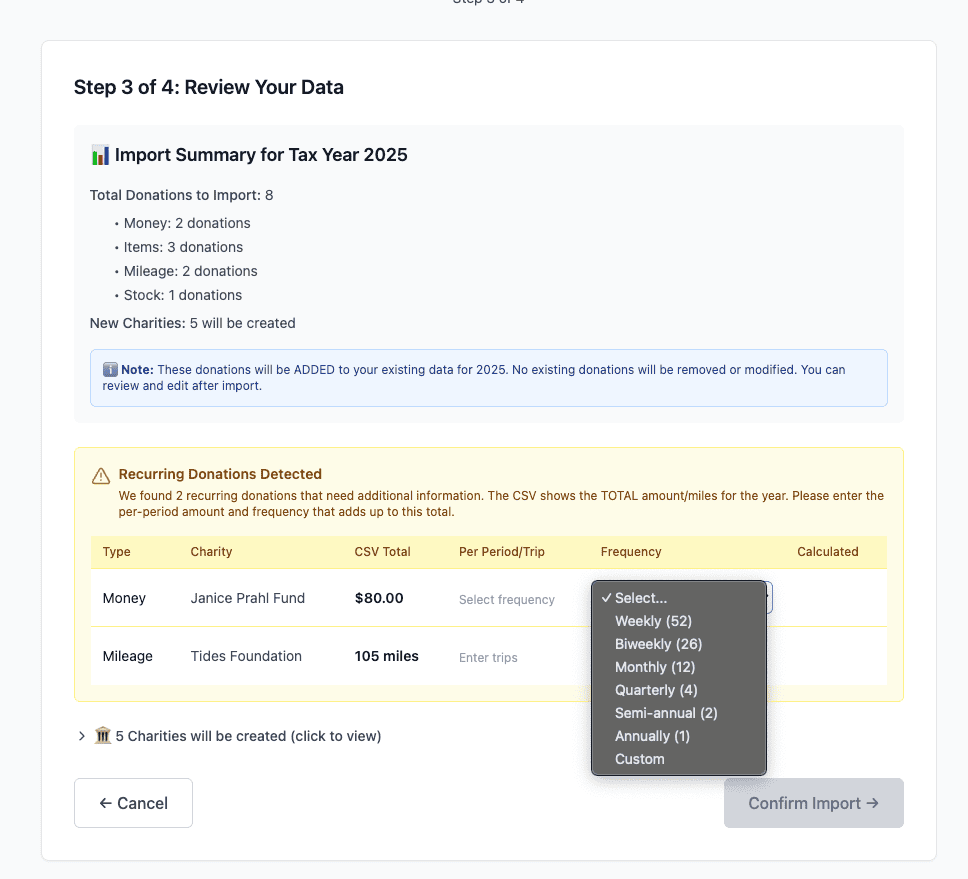
Step 4: Review Import Instructions
Sometimes, Deductible Duck will ask you questions about your donations, specifically about Recurring donations (which ItsDeductible did not fully export into the CSV). Answer these questions to continue.
Step 5: Click “Start Import”
- Once your file is selected, click the blue “Start Import” button at the bottom right.
- Deductible Duck will begin reading your file.
- You will be guided through any additional steps.

What Happens Next
Once you click Start Import, you will see:
Step 1 of 4: Upload Your Data – (You are here)
After you proceed, you will see additional steps:
- Step 2: Confirm which donations to import
- Step 3: Map your data fields
- Step 4: Review and finalize
ℹ️ Tip: The import process guides you through each step. Take your time and review the information carefully.
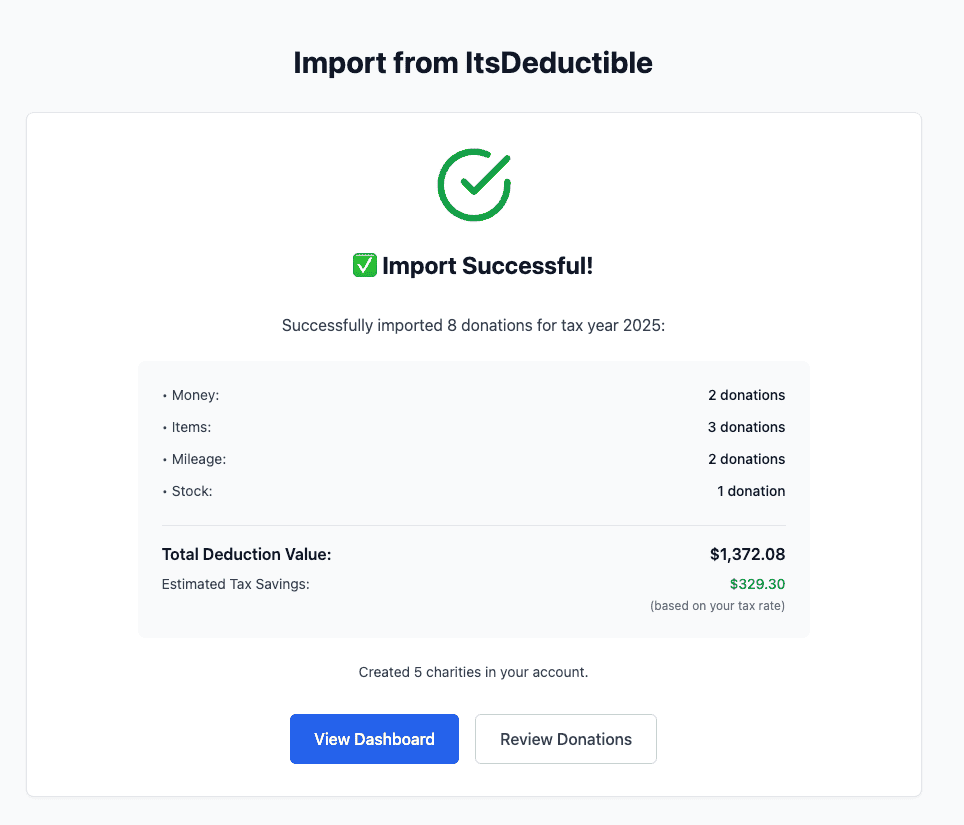
After Import is Complete
Once your data is imported:
- You will return to the Home dashboard.
- Your donations will appear in the appropriate categories (Items, Money, Mileage, Stock).
- Your totals will update automatically.
- Review the imported donations to make sure everything looks correct.
⚠️ Important: Double-check that all donations were imported correctly. If you notice missing or incorrect donations, you can edit or add them manually.
Troubleshooting
“File size too large”
- Your file is larger than 10 MB.
- Try breaking your data into smaller files and importing separately.
“File format not supported”
- Make sure your file is ZIP or CSV format.
- Remember, PDF is not accepted
- The CSV file must be a format from ItsDeductible ONLY
- Check the file extension (.zip or .csv) at the end of the filename.
“Some donations didn’t import”
- Some donations may have had incomplete or incorrect information.
- Review the error report Deductible Duck provides.
- Manually add any missing donations using “Add a donation” on the Dashboard.
Going Back
To return to the main Dashboard, click Home in the left sidebar.